Week 3 | February 9th
- Wp-Admin Panel
Steve Jobs on How to Live BEFORE You Die
![]()
Using WordPress: Log in the Admin Panel
To access your WordPress administration panel, you will (in most cases) add “wp-admin” at the end of your domain name in your web browser.
For example: http://www.yourdomain.com/wp-admin/
When you installed WordPress through the one-click install on Mojo, they gave you a username and password. Use that to login to your WordPress admin panel.
If you are successful, you will see a screen similar to the one below:

Using WordPress: Installing Plugins
(WordPress Plugin) Plugins are pieces of code created with the purpose of expanding the functionalities of a software, in this case of WordPress. There are literally thousands of WordPress plugins already created, solving a wide range of problems and needs.
WordPress: What is a Plugin?
(WordPress Plugin) Plugins are pieces of code created with the purpose of expanding the functionalities of a software, in this case of WordPress. There are literally thousands of WordPress plugins already created, solving a wide range of problems and needs.
They are third party pieces of software you are able to install and use on your WordPress website. Plugins are typically developed to add additional functionality to your website that is not included in the standard installation of WordPress. Some examples of plugins are image galleries, contact forms, and banner rotators.
Searching for & Installing Plugins
One of the best features of WordPress is the ability to customize your website with Plugins. Plugins are easily downloaded and installed and within minutes. You can easily add customized functionality to your website.
- Login to your WordPress Dashboard. Once logged in, click “Add New” under “Plugins”
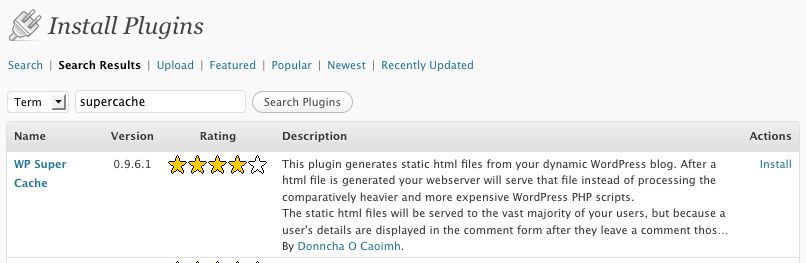
- Search for a plugin using the search feature.
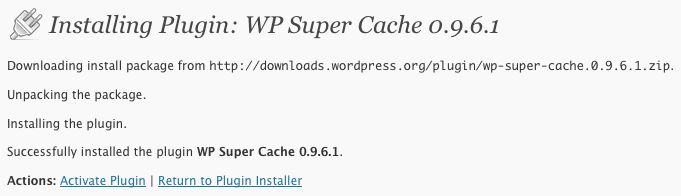
- If you wish to use the plugin after reading about it, click on “Install Now”
- After the plugin has been successfully installed, you will need to click “activate plugin” to begin using it. To change the settings of your plugin, click on the “Settings” menu option on the left hand side to access the settings for your new plugin.
Updating a WordPress Plugin
Plugins like any other piece of software need to be updated from time to time. When a new version of the plugin is released you may need to update the plugin. Most plugins are updated to patch a security risk, or to add more features to the plugin. It is important to keep your plugins up to date for security purposes.
How do I know if a plugin needs to be updated?
Log into your WordPress Dashboard and select the plugins menu option. If you have a Plugin that needs to be updated, the plugins menu will have a number next to it.
On the Plugins page, you will see a message letting you know there is a new version available.
Click on the “update automatically” link, and it will lead you to a page to automatically install the update for that plugin.
Recommended Plugins for WordPress
Here is a list of some basic WordPress plugins to help you get started. There’s hundred more available but here are three you may want to use:
WP Super Cache – This is a caching plugin for WordPress. One of the main issues we see with WordPress sites is that if caching is not enabled, it causes some sites to load slower and use more resources. It is highly recommended to install Super Cache to help prevent these issues.
W3 Total Cache – This is an even more advanced caching plugin for WordPress. It’s recommended to use this caching plugin if you’re having issues with a large amount of 404 errors on your WordPress site.
Limit Login Attempts – This is a plugin that will limit the number of failed login attempts allowed, and will temporarily ban the IP address from trying anymore login attempts.
Captcha – This is a CAPTCHA plugin that operates by asking simple math questions to prove a human is filling out a form instead of a spam bot.
Google XML Sitemaps – To help your Search Engine Optimization and increase your visibility to customers, it is recommended you use the official Google XML Sitemaps widget. This will create a sitemap for your website which search engines look for when they crawl your site.
Akismet – This is a plugin that will help block spam from being posted in your Comments section.
These steps will help you install and select a WordPress plugin for your website.

- Inside the WordPress Dashboard, select the Add New link from the Plugins menu.
- You can search for a plugin based on name, category, or function.
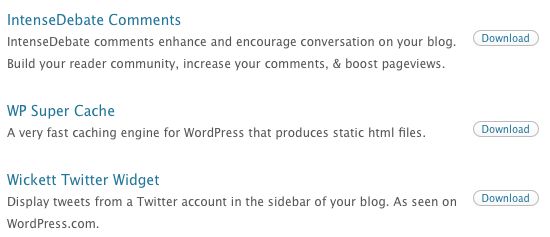
- Click the Download link to the right of the plugin you’d like to download.
- Click the Install button for your desired plugin.
- Your plugin is now available. Click on the ‘Activate’ link to activate it.

Your WordPress blog has now incorporated the plugin you activated.
Design, Sustainability, Change
A Little Inspiration.
INTRO TO WORDPRESS THEMES
What is a Theme?
A theme is simply collection of files that allow you to “skin” your WordPress site. A theme is comprised of template files, that determine the components that will go on each type of page, and a styles sheet or sheets that control fonts, colors and layout. Themes are stored in wp-content > themes.
A WordPress “theme” generally consisting of:
- One or more CSS style sheets
- Any necessary images that comprise the theme graphics
- A collection of PHP/HTML “template” files
- A thumbnail image representing the theme in the Dashboard
A typical WordPress theme contains a dozen or more files, but only a few are technically required.
These files work together as a package to define the entire look and feel – and sometimes behavior – of a WordPress site. Themes are completely decoupled from site content, so a site owner can apply a new theme with the click of a button and have all content on their site take on a whole new appearance.
This collection of files is contained in a folder that lives in the wp-content/themes directory on your web server. When an administrator visits the Appearance | Themes section of the WordPress Dashboard, all valid theme folders in that location will appear. Any valid theme can be applied to the site content by clicking the Activate link below its name.
Your WordPress install comes with two themes installed, but there are thousands of third-party themes that you can install yourself. You can browse them on the WordPress.org site or Google “free WordPress themes”.
CHOOSING THEMES
When choosing a theme, make sure that it is compatible up to your version of WordPress ( the current version is 4.1). Many new features were introduced, and you want to make sure to take advantage of them.
RESPONSIVE THEMES
A responsive WordPress theme is a theme built to adapt it’s design to tablets and smartphones, creating a great user experience. Previously, dedicated WordPress mobile themes was the best option, but in 2013, responsive WordPress themes are the hot new trend. With the rapid growth of smartphones, tablet computers and Internet enabled gadgets, we have to take mobile web design seriously and ensure that your theme is can be viewed easily on any mobile device.
Responsive web design allows your website content to be displayed correctly by adjusting the layout to accommodate screens of different orientation and sizes. From a branding perspective, responsive themes allow you to maintain one theme and provide one consistent look and feel no matter how visitors access your website. This is a huge money saver for clients as there is not longer the need for mobile versions of websites. To test responsive layouts, check out some responsive web design tools.
Checking Your Themes
A quick note on downloading and installing themes. There are thousands of FREE and PREMIUM themes out there and not everyone is as honest and straightforward as we hope they’d be. It’s good practice to check your themes prior to installing them.
Take a look at: TAC (Theme Authenticity Checker)
Scan all of your theme files for potentially malicious or unwanted code. Be aware of advertisements or dangerous JavaScript inserted into legitimate themes by third party theme download sites.
Future versions will allow to check for other theme vulnerabilities. CHECK YOUR THEMES BEFORE INSTALLING THEM!
Installing Themes
There are two ways to install a new theme, through the WP admin tools, or by downloading and uploading it into the themes directory. Which you use will depend on how you FTP into your hosting account.
INSTALLING VIA ADMIN
From the admin, go to Appearance > Themes
To install a NEW theme that is not currently available through your WordPress panel, do the following.
- Go into your ADMIN panel
- Go to APPEARANCE
- Go to THEMES
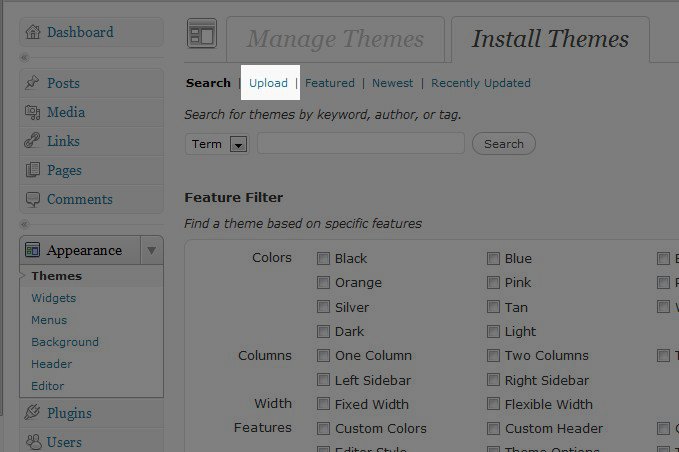
- Click on INSTALL THEMES
- Click on UPLOAD and upload the theme that you’ve already downloaded from the web and saved to your hard drive
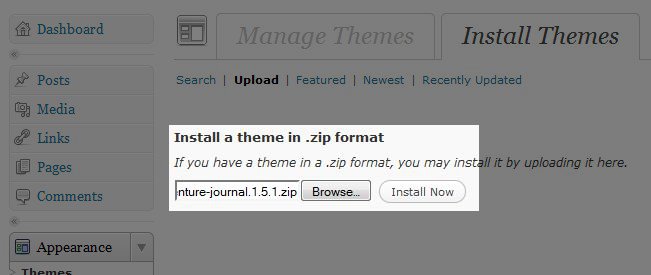
- Click on BROWSE and UPLOAD the theme
- Click on INSTALL and then PREVIEW
THEME OPTIONS
Some themes have an options panel that allow you to further customize appearance and layout. What the options are will vary from theme to theme. “Paid” themes usually offer you more options and more documentation.
WORDPRESS THEMES
Finding a new theme online
While WordPress comes with hundreds of themes available to be automatically installed through the Dashboard, you may not be able to find one that meets your needs perfectly. With thousands of themes available online, to help you get started below I’ve outlined how to find more WordPress themes online.
What types of themes are available online?
There are two main types of themes available fro you to use: free and paid. Look into the free themes first since there’s no point in paying for a theme if you can find a free one that you like. Many free themes will have a line at the bottom of your theme giving credit to the person that made it, but beyond that you can fully customize them. If you purchase a theme, some sites will sell a theme by itself while at other sites you will pay a yearly fee to have full access to their themes.
Where do I find themes online?
Many websites offer WordPress themes and a simple Google search returns millions of links to websites for WordPress themes . To help you get started, below I’veoutlined some of the more popular theme sites. Themes commonly used by WordPress users:
Free Themes
Paid Themes
Once you have downloaded the theme you want to use, you will need to install the theme. Most themes will contain documentation on how to manually install the theme and any plugins the theme may require you to install.
Installing a WordPress Theme from the Internet
Any theme you find online can easily be installed using your WordPress dashboard. You will need to download the theme to your local computer, usually a compressed zip file, and then proceed to upload it.
Installing a Theme Manually in WordPress
Download the theme from the internet. Once you have downloaded the compressed file, in the WordPress dashboard, click on “Appearance” which will bring you to the “Themes” page.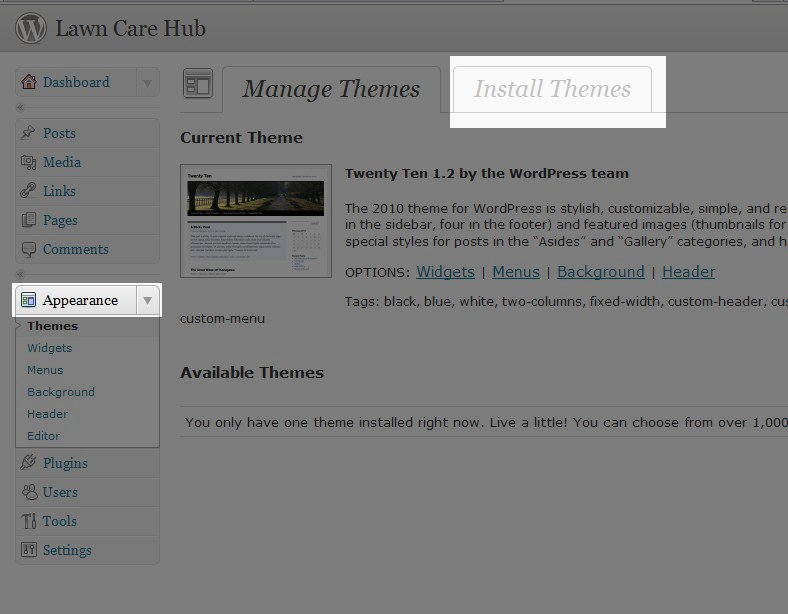
Click on “Install Themes“, them proceed to click “Upload”
Click on the “Browse” button and find the file you saved on your computer. Once you have located the zip file, click “Open” and then “Install Now”
Your new theme may take a few minutes to upload. Once the upload process is complete you will see the following screen. You can now preview how the theme will appear on your website.

Click “Preview” to preview how your website will look with the new theme.

Once you determine if you like how your website look, click “Activate” under the theme and this will enable the theme to publish to your website.

Your website it now using your new theme! You can now visit your website in the browser and make sure the theme displays properly.
Changing Your WordPress Theme
You can change your WordPress theme, you can. It’s a simple process done through your WordPress dashboard.
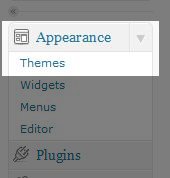 |
To change the theme, you will need to log into your WordPress Dashboard. Once you are logged in, select “appearance” on the left menu pane. |
 |
Be sure to click on the Manage Themes tab. It will automatically display. |
You can change to any theme you may have installed by simply clicking on the “activate” button. Selecting a new theme will not affect your content BUT it can impact whether widgets and plugins functions. Once you have changed your theme, it’s wise to visit your website in a web browser and test it to make sure it is functioning correctly. If it is not, you may need to disable some plugins or widgets that may not be supported.
ADDITIONAL RESOURCES ON THEMES
A WORD OF ENCOURAGEMENT FROM KID PRESIDENT
What are Widgets?
Widgets provide a way to arrange your sidebar content without having to alter your actual code of your website. Widgets can be a calendar, search bar, or many other types as well.
Finding and Installing Widgets in WordPress
Widgets add functionality to the sidebar of your WordPress website. Follow the steps below to add new widgets to your website.
1. First, login to your WordPress dashboard. After you have logged in, click “Widgets” under “Appearance”
This screen contains three areas of interest:
- Available Widgets
- Inactive Widgets
- Primary Widget Area
How to activate Widgets
Widgets that are listed in the Primary Widget Area are widgets on your website the you are currently using. To use another widget, simply drag the widget you want to use from the Available or Inactive list to the Primary Widget Area. Your theme may contain multiple areas that use widgets. If this is the case, you can add widgets into the Secondary, First Footer, and Second Footer areas.
Changing the Order in which Widgets Appear
Widgets load in the order in which they are listed in the sections. If you wish to change the order of the widgets simply drag the widgets under “Primary Widget” to the order you wish to have them display.
How to use the WordPress Text Widget
The WordPress Text widget is the easiest way to add custom HTML code to your WordPress sidebar.
In this article, I’ll show you how to add an “About us” section to your sidebar.
- Log into your WordPress Dashboard
- Under Appearance, click “Widgets”
- Find the “Text” widget under the “Available Widgets” section, and drag and drop it to your “Main Sidebar” section.
- A window will appear in which you can type in a title and text for your widget. Enter your text, and then click “Save” and then click “Close”.
- Your widget is now saved and is visible on your website!
Customizing your WordPress Sidebar
How to add images and image links to your WordPress sidebar
The sidebar is a wonderful piece of real estate on your site to place relevant content that may not fit directly on a page or post. Most content in a sidebar is text, however you can certainly add some diversity by making some of those text links into buttons or image links.
RESOURCE for HTML code W3Schools
- LINK TO AN EXTERNAL WEBSITE
- ADD AN IMAGE
<img src=”url” alt=” some_text”>
WEEK 3 HOMEWORK | Due 2.16.15
- Each week you will post a link to your homework on your own WordPress website in the comments section of this blog.
- Go to your DASHBOARD and install a theme (you may not use the default theme) under appearances, select themes and choose a new theme. You may not choose the standard 2015 theme. Give me the name of the theme you chose.
- Fill out the personal info on the site in the SETTINGS on the dashboard.
- Add the following PAGES to your website:
- About
- Contact
- Ramapo
- Interactive Media (Make Ramapo the “parent” page)
- On the ABOUT page, add a photo of yourself, an artist statement and a bio. Have the image ALIGN LEFT. You should UPLOAD your headshot onto Flickr and insert it into your ABOUT page using INSERT URL. When upload your photo to Flickr, change the title and description, create a set, upload to photostream. Click on the photo you want to use, shift click and select view original image, choose the size you want the image to be, shift click on the image ad COPY image URL.
- On the CONTACT page, add a contact plugin form. Try searching for Contact Form 7 in PLUGINS under POPULAR.
- ON the RAMAPO COLLEGE page create a list of all your RAMAPO spring2015 classes.
- On the INTERACTIVE MEDIA page, create a list with the following information:
- Week 1 Homework | Due 1.31.15
- Week 3 Homework | Due 2.16.15
- Week 4 Homework | Due 2.23.15
- Week 4 Homework | Due 3.2.15
- Week 5 Homework
- Week 6 Homework
- Week 7 Homework
- Week 8 Homework
Create a POST called WEEK 1 HOMEWORK | Due 1.31.15
- On that post write links to all your homework. Copy the URL. Go to the page you created called INTERACTIVE MEDIA. Highlight Week1 Homework, click link and paste in the blog URL.
Create a POST called WEEK 3 HOMEWORK | Due 2.16.15
- Create a POST on your website titled Week 2 homework
- Create a POST titled Week 3 Homework. ADD the categories: Interactive Media and Week 3 Homework. In this post, list links to week 3 homework including:
-
- List the Theme you added to your site
- List the PLUGINS you added to your site (Add at least SIX plugins).
- List any widgets you added
-
- List your Flickr url
- List your Delicious url
- On your del.icio.us account tag three Web Sites that focus on WordPress, WordPress themes, plugins, widgets or anything we learned in class today, and write a note in the Delicious comments section about why you think each one would be a good resource for this class. ALSO, add the words “week 3” in your comments section so that I can keep track of your comments. *Make sure you also add the tag: ramapointeractivemedia2015 AS WELL AS add additional tags.
- Go to your wp-admin panel and install a theme (you may not use the default theme) under appearances, select themes and choose a new theme.
- Fill in the about section on your WordPress dashboard.
- On that post write links to all your homework. Copy the URL. Go to the page you created called INTERACTIVE MEDIA. Highlight Week 3 Homework, click link and paste in the blog URL.
https://delicious.com/jboullianne9294
https://www.flickr.com/photos/130178747@N04/
http://www.joeyboullianne.com/
http://britfa.gs/b/src/142255689422.jpg
DELICIOUS
*Make sure you also add the tag: ramapointeractivemedia2015 AS WELL AS add additional tags.
https://delicious.com/mnconiglio
https://www.flickr.com/photos/125648650@N07/
http://www.monicaconiglio.com/
*Make sure you also add the tag: *Make sure you also add the tag: ramapointeractivemedia2015 AS WELL AS add additional tags.
I thought I did add the tag: ramapointeractivemedia2015.
Is it not showing for you?
Did you add MULTIPLE tags?
https://delicious.com/lindsayperrotti
http://www.lindsayperrotti.com
https://www.flickr.com
You did not give me a correct Flickr link.
https://delicious.com/aiannant
http://www.alexaemilia.com
https://www.flickr.com/photos/130841734@N02/
username: aiannant
https://delicious.com/melissabandstra
http://melissabandstra.com/
https://www.flickr.com/photos/130154421@N03/
On your del.icio.us account tag three Web Sites that focus on WordPress, WordPress admin panel, or anything we learned in class today, and write a note in the Delicious comments section about why you think each one would be a good resource for this class. ALSO, add “week 1 hw” in your comments section so that I can keep track of your comments. *Make sure you also add the tag: *Make sure you also add the tag: ramapointeractivemedia2015 AS WELL AS add additional tags.
https://delicious.com/kkemner
https://www.flickr.com/photos/129181913@N04/
https://www.mojomarketplace.com/account/installs
Where’s your link to your website?
https://www.flickr.com/photos/130166966@N02/
https://delicious.com/saiello
https://my.bluehost.com/cgi/home
ALSO, add “week 1 hw” in your comments section so that I can keep track of your comments. *Make sure you also add the tag: *Make sure you also add the tag: ramapointeractivemedia2015 AS WELL AS add additional tags.
Where’s your link to your website?
http://www.sophiaaiello.com
http://www.leahmartocci.com/
https://delicious.com/leahmartocci
https://www.flickr.com/photos/130234580@N08/
https://www.flickr.com/photos/130951075@N07/
https://box1119.bluehost.com:2083/cpsess9726547635/frontend/bluehost/index.html?post_login=88554178001044
.
Where’s your Delicious link
That’s no the link to your website
https://delicious.com/lindsayperrotti
http://www.lindsayperrotti.com
https://www.flickr.com/photos/130161054@N03/
https://delicious.com/mdickman
https://www.flickr.com/photos/130921949@N02/
Where’s the link to your website?
On your del.icio.us account tag three Web Sites that focus on WordPress, WordPress admin panel, or anything we learned in class today, and write a note in the Delicious comments section about why you think each one would be a good resource for this class. ALSO, add “week 1 hw” in your comments section so that I can keep track of your comments. *Make sure you also add the tag: *Make sure you also add the tag: ramapointeractivemedia2015 AS WELL AS add additional tags.
https://delicious.com/jbadrow
http://www.jenniferbadrow.com
https://jenniferbadrow.wordpress.com
https://www.flickr.com/photos/130161303@N03/
DELICIOUS
https://delicious.com/kajpatel
BLUEHOST
http://www.kajalpatel6.com/
FLICKR
https://www.flickr.com/photos/130961594@N04/
https://delicious.com/kylan
https://www.flickr.com/photos/130922901@N07/
Blue Host:
http://www.kylanoshea.org
https://delicious.com/br3mill5
http://www.briannaruthmills.com/
https://www.flickr.com/photos/130921649@N02/
Here is my link for my Blue Host.
http://www.thomastsotas.com/
Where’d your link to Delicious and Flickr?
https://www.flickr.com/photos/130921949@N02/
https://delicious.com/mdickman
https://www.flickr.com/photos/131140910@N03/
https://delicious.com/shaleah.peyton1
MISSING
Delicious links
Flickr image no uploaded
Website not up
Bluehost
http://www.nbender1014.com
Delicious
http://delicious.com/nbender1014
Flickr
http://www.flickr.com/photos/130154471@N03/with/16297865407
http://www.kellykemner.com/?p=30
Homework Week 3
http://www.leahmartocci.com/
Still editing but my webpage is now active
Still editing but my webpage is now accessible